

In our previous posts we have been working on GitHub DevOps, Continuous Integration, and scheduled testing. To date, our testing has been validating that our code will run in the current and next major release of Business Central. That lets us know that the code compiles, it doesn’t confirm that the code functions as expected. What we need are tests, that we can run automatically, that validate that our extensions function as expected.
We are going to start with some simple tests against our current BC Journey project. Know that Business Central test creation is a very deep topic, and we will be in the shallow end for this post.
An excellent resource for Business Central Automatic Testing is a book written by Luc van Vugt “Automated Testing in Microsoft Dynamics 365 Business Central“. The book isn’t just an amazing resource, but Luc is an amazing contributor to the Business Central Community.
Story Time! Early in the Business Central SaaS world I was working on some automatic testing, reading Luc’s book, and I hit a snag. I sent a note to Luc hoping for a hint on what I was missing. Luc jumped right in, setup a meeting and we reviewed my testing and found some opportunities to improve my testing processes. It is people like Luc that make the Dynamics BC Community so amazing.
I will be working with a Docker BC Sandbox with the “-includeTestToolkit” flag set when built. This includes additional tools and resources we will need. You can review how to install Docker and create a Business Central Sandbox container here: AardvarkLabs A Whale of a Time
Business Central Tests are Code Units in an Extension. When we run Continuous Integrations with AL-Go, the tests are run and if they fail, that CI fails, and we can review the reports and update the code as needed.
First, we need to create an extension to contain our tests. This extension is separate from our primary extension with all the customizations in it. There is an Action in the GitHub AL-Go template that will automatically create and configure your project with a Test.
We are going to run the “Create new test app” action. When we click Run workflow, there are a few settings to fill in.
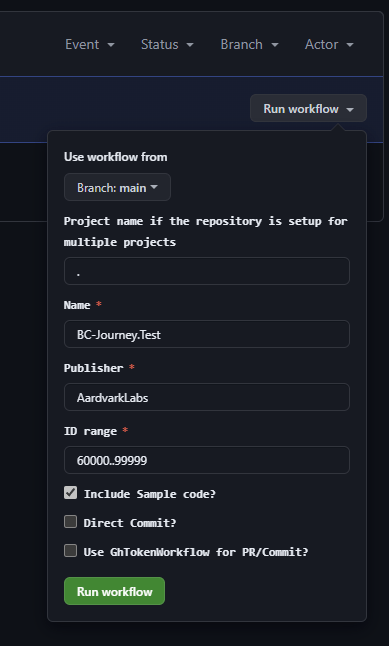
I set the name to the “Project name.Test” and filled in the Publisher and set the ID Range to start at 60000. I chose 60000 because the core extension starts at 50000 and we can’t have any overlap in number ranges. I then clicked the green “Run workflow” button.
Note that I left the “Include Sample Code” button checked but deleted the sample HelloWorld.Test.al file. It is an interesting read, but not the test I wanted to run in this example. Feel free to clear that check box or delete the file yourself.
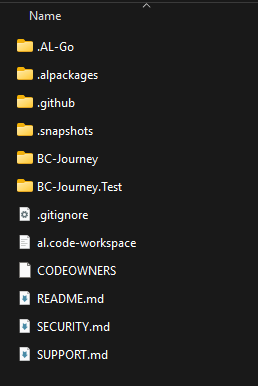
When the Action completes, I have a new folder in my repository titled BC-Journey.Test.

Synchronize the repository to your desktop.
When we write test code units, they follow a very specific format. At a minimum, we provide four bits of information; Scenario, Given, When, Then. We will see them as comment blocks describing the test allowing us to understand what and how the validation runs.
Let’s create a test to validate the work we did in BC AL Journey #13 as a refresher, here are the requirements that we implemented.
Implementation
- Create a Warranty Claim table to track
- ID
- Customer No
- Description
- Details Text of 255 characters
- Date the claim was entered
- Date should default to the current date
- Boolean indicating if the claim has been resolved.
- List needs to appear on the customer card.
- The list should be in its own group labeled Warranty Claims
- The Group and list should appear after the General section.
Test Plan
- Enter a warranty claim on the customer record
- Check that the claim loads
Those tests should be something that we can automate.
Open BC-Journey.Test folder in Visual Studio Code.
The first thing we need to do, is edit the prebuilt App.JSON and add our own solution to the dependencies. In order to write tests against our code, we have to add it as a dependency. There are also additional extensions that support testing, we will add those as well.
{
  "id": "d7fffb6d-7b16-4652-9cc1-515d35e38c51",
  "name": "BC-Journey.Test",
  "publisher": "AardvarkLabs",
  "version": "1.0.0.0",
  "brief": "",
  "description": "",
  "privacyStatement": "",
  "EULA": "",
  "help": "",
  "url": "",
  "logo": "",
  "dependencies": [
    {
      "publisher": "Microsoft",
      "name": "Library Assert",
      "id": "dd0be2ea-f733-4d65-bb34-a28f4624fb14",
      "version": "22.0.0.0"
    },
    {
      "publisher": "Microsoft",
      "name": "Any",
      "id": "e7320ebb-08b3-4406-b1ec-b4927d3e280b",
      "version": "22.0.0.0"
    },
    {
      "publisher": "AardvarkLabs",
      "name": "Aardvark Labs Basic Customizations",
      "id": "776d940f-fc7f-4a22-8901-3c34407df048",
      "version": "1.0.0.0"
    },
    {
      "id": "5d86850b-0d76-4eca-bd7b-951ad998e997",
      "publisher": "Microsoft",
      "version": "18.0.0.0",
      "name": "Tests-TestLibraries"
    }
  ],
  "screenshots": [],
  "platform": "1.0.0.0",
  "application": "22.0.0.0",
  "idRanges": [
    {
      "from": 60000,
      "to": 99999
    }
  ],
  "features": [
    "NoImplicitWith"
  ],
  "resourceExposurePolicy": {
    "allowDebugging": true,
    "allowDownloadingSource": false,
    "includeSourceInSymbolFile": true
  }
}
Just like our other projects, edit the .vscode\Launch.JSON file to point it to a system with your solution deployed. Then download symbols to retrieve the requisite Business Central components as well as your solution files.
I’m going to walk through the test specific components of this solution, the entire solution can be found on GitHub. BC-Journey.Test
I’ve created a file named ARDWarranty.Test.al, in this file we will do all of our testing for the criteria we have outlined.
A little lite setup for this code unit.
codeunit 60001 "ARD_Warranty.Test"
{
    Subtype = Test;

    [Test]
    procedure TestCustomerWarranty()
    var
        CustomerRec: Record Customer;
        WarrantyRec: Record ARDWarrantyClaim;
        CustomerCard: TestPage "Customer Card";
        Assert: Codeunit "Library Assert";
        LibrarySales: Codeunit "Library - Sales";
    begin

    end;
}
Important things so far:
1. The code unit has a subtype = test; declaration.
2. The procedure I created for the test has a [Test] declaration above it.
In our procedure we are going to need a record for the Customer and warranty claim we want to test, and a “TestPage” of the Customer Card. There are additional code units provided by Microsoft that will support for our testing functions such as Library Assert and Library – Sales.
The TestPage variable is a special version of the Page variable that allows for us to leverage some automatic testing functions. It wraps the page and gives us the ability to click and type on the page as a user would.
We are now going to define our “Scenario” and “Given” portion.
//[Scenario] A customer is assigned a Warranty Claim
//[Given] A customer record has a Warranty Claim Record associated with it.
LibrarySales.CreateCustomer(CustomerRec);
CreateWarrantyClaim(CustomerRec."No.", WarrantyRec);
The Library – Sales Code Unit has some great tools in it for helping with testing. We are making use of the Create Customer procedure to create a customer to test against. We can’t count on sample data being available, and this routine allows us to create a customer for testing. The CreateWarrantyClaim procedure simply creates a new warranty claim record for the customer, this procedure is in our code unit.
Now on to the “When”
//[When] The Customer Card is edited
CustomerCard.OpenEdit();
CustomerCard.GoToRecord(CustomerRec);
This opens the Customer Card for editing and navigates to the customer record we created.
Last we validate the “Then”
//[Then] The Warranty Claim is visible and has the desired value
        CustomerCard.ARDCustomerClaims.Expand(true);
        CustomerCard.ARDCustomerClaims.First();
        Assert.IsTrue(CustomerCard.ARDCustomerClaims.Date.Visible(),  'Claim Date should be visible');
        Assert.AreEqual(CustomerCard.ARDCustomerClaims.Details.Value(), WarrantyRec.Details, 'Claim Details should be complete');
We need to expand the Customer Claims sub part. The sub part is also a List Part, so we need to specify which record in the list part we are testing against, in this case we are testing against the first record. There are additional navigation commands we can use to iterate through a larger list if needed.
The “Assert” statements are tests that we perform. If the Assert fails, then our test fails. Assert.IsTrue tests that the statement is true, else it fails with the provided message. The Assert.AreEqual tests taht the two statements are equal, else it fails with the provided message.
Here we are testing that a field in the grid is visible, ensuring that our list part is on the page. We then test that the details are equal to what we expect from our Warranty Claim. There are several more Assert statements available depending on what you are validating.
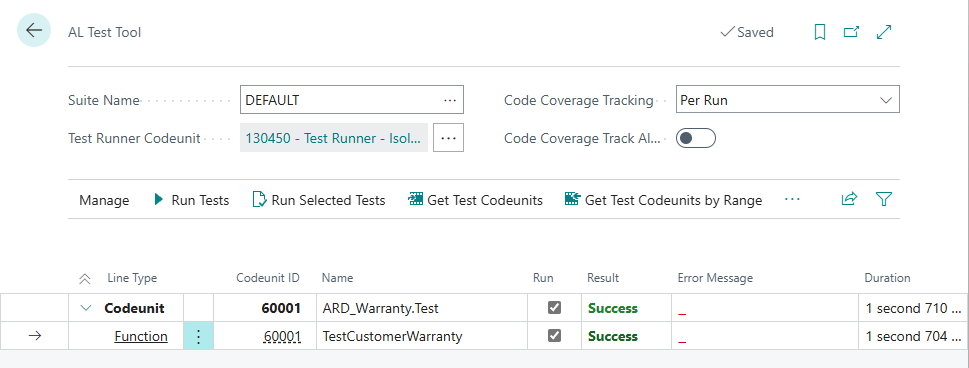
If we want to run this test, we publish it to Business Central and go to the “AL Test Tool” page. You could also edit the .vscode/Launch.json “startupobjectid” to 130451 to have your test extension launch to the AL Test Tool page or use the “Tell Me” magnifying glass.
We need to get the test code units we want to run.

Then select your new test code unit.
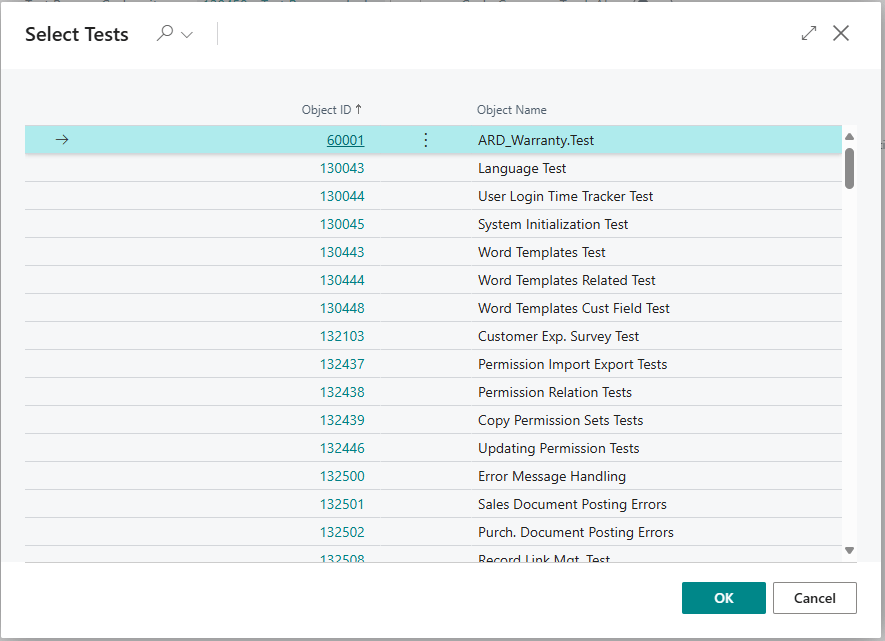
Click “OK” and you should see your code unit and test loaded.
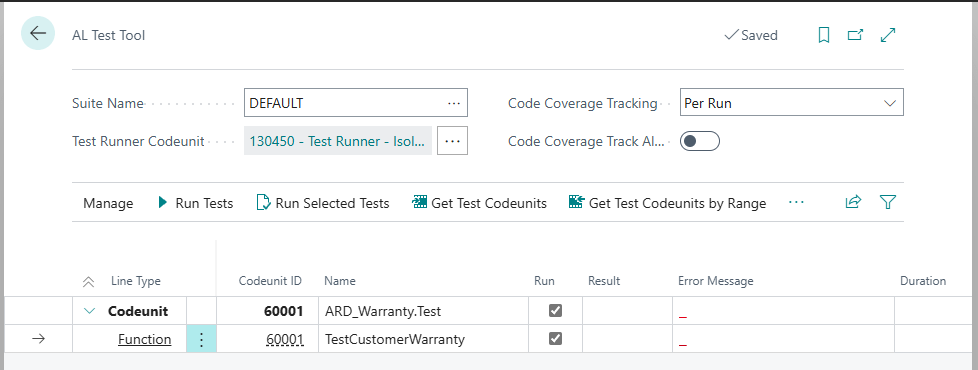
Click the “Run Tests” button, and select “All” to run all the tests.
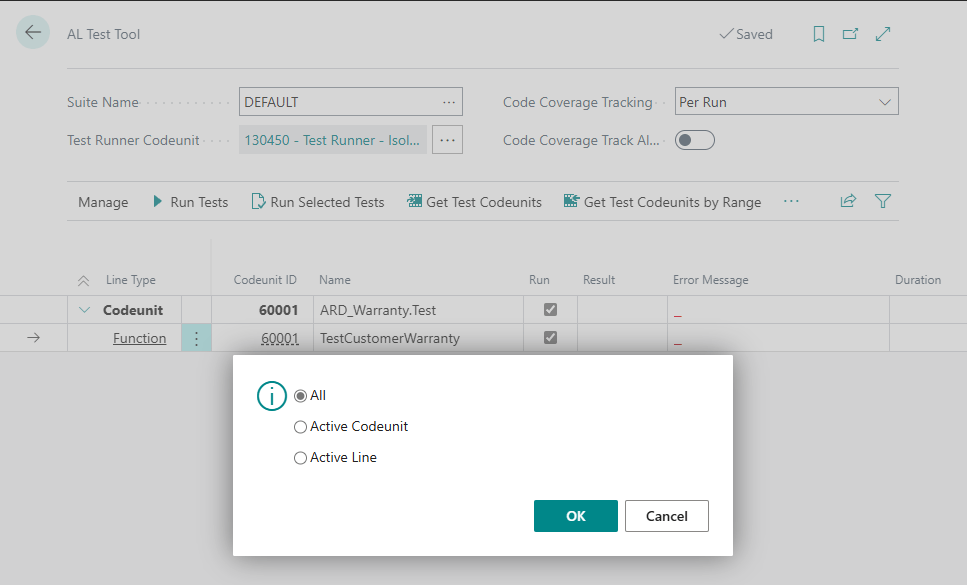
A little working screen later and we have our test results.
This simple test is great, but we need this to be part of the Continuous Integration process in AL-Go. This way every time CI or our Next Major Release workflows run, this test will be executed as well. To enable this, we edit the .AL-Go/settings.json to tell AL-Go where the test extension is located.
{
  "country": "us",
  "appFolders": [
    "BC-Journey"
  ],
  "testFolders": [
    "BC-Journey.Test"
  ],
  "bcptTestFolders": []
}
This matches the folder structure I have for the extension.
When the CI process runs, we can review the output and note that the tests ran successfully.
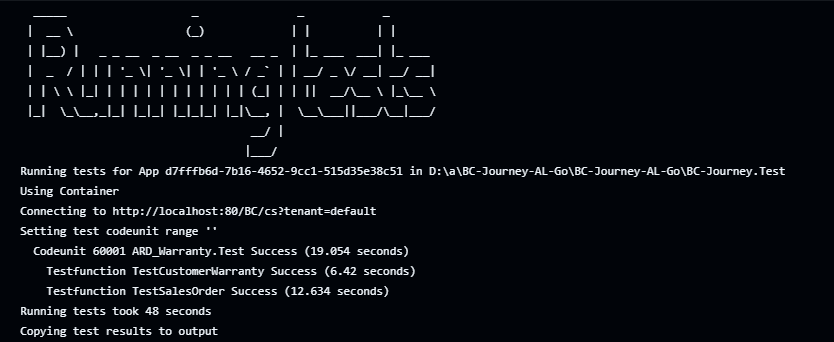
If you are interested, I’ve included a bonus test of BC AL Journey #11. In this example we validate that a Sales Order with a warranty, but no expiration date, gets a date assigned on posting.
I hope this simple introduction encourages you to dig deeper into Business Central AL Testing. This is an excellent way to improve your solutions, provide better CI validations and have some assurance that as Microsoft updates Business Central, your extensions will function as expected.


Leave a comment