

BC AL Journey #26
Earlier in BC AL Journey#25 we introduced the concept of a Business Central Query Object. We used that Query for data analysis inside Business Central. In this chapter of our journey, we are going to create a Query specifically for API data handling.
Creating an API Query immediately makes its data accessible to external systems like Power Automate, Power BI, or anything else that can connect to Business Centrals APIs.
Let’s create a simple API similar to the Customer Ledger API we made in the previous example, this time a Vendor Ledger API.
I’ll create a file in the 12 – Query folder named ARDVendorLedgerAPI.Query.AL.
Here is the Code for the Query:
namespace BCJourney.BCJourney;
using Microsoft.Purchases.Vendor;
using Microsoft.Purchases.Payables;

query 50001 ARD_VendorLedgerAPI
{
    Caption = 'Vendor API';
    APIGroup = 'aardvarkLabs';
    APIPublisher = 'aardvarkLabs';
    APIVersion = 'v1.0';
    EntityName = 'vendorPurchase';
    EntitySetName = 'vendorPurchases';
    QueryType = API;

    elements
    {
        dataitem(ard_vendor; Vendor)
        {
            column(systemId; SystemId)
            {
            }
            column(no; "No.")
            {
            }
            column(name; Name)
            {
            }
            dataitem(ard_Vendor_Ledger_Entry; "Vendor Ledger Entry")
            {
                DataItemLink = "Vendor No." = ard_vendor."No.";
                SqlJoinType = LeftOuterJoin;
                DataItemTableFilter = "Document Type" = filter(Invoice | "Credit Memo");
                column(totalPurchaseAmount; "Purchase (LCY)")
                {
                    caption = 'Total Purchase Amount', Locked = true;
                    Method = Sum;
                }
                filter(dateFilter; "Posting Date")
                {
                    Caption = 'Posting Date';
                }
            }
        }
    }
}
Nearly identical to last weeks example, with the addition of the API definitions in the header. Note that Query Type has changed from “Normal” to “API”. We also have to include the API details the same as when we created the Item API in BC AL Journey #8.
Let’s hop over to Power BI and access this API for some simple reporting.
I’m going to start with a Blank Report then Click “Get Data”.
Then I’m going to filter down to Business Central and select the “Dynamics 365 Business Central” option. Then click “Connect” in the bottom right.

You may need to authenticate, but once connected you will see a list of Business Central Environments. I published this to the AardvarkLabs sandbox.
We can drill into the list of APIs and find the AardvarkLabs list under that Advanced APIs section.
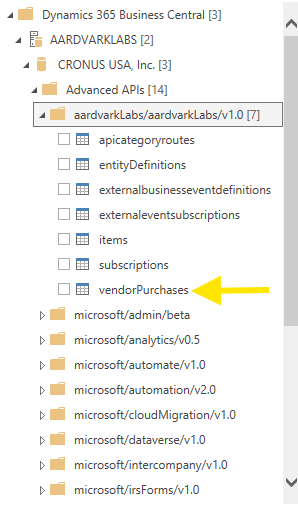
There is the vendorPurchases API, and our old friend the Items API we created BC AL Journey #8!
Check the box on the vendorPurchases API and click “Transform Data”.

There are 2 columns we don’t need in this Power BI Example, the dateFilter_FilterOnly and ETag. Right click on the dateFilter_FilterOnly column header and select “Remove”.’

Do the same for eTag, then “Close and Apply” to have a ready to use dataset.
The filter column is something we are going to come back to later. We need to bring more advanced API handling tools into play and that is a topic we will cover in another post.
We are now back in Power BI and we can drag and drop ourselves a little Bar Graph.

Yeah, invoices are negative, it is an accounting thing.
So why do this instead of something like the Items API we created earlier? Well there are a few reasons.
First, it is super easy to handle related records. If we wanted to include related records in a page-based API, we would need to create a completely separate list part and include that in the API. Also, a Query can go several layers of related records deep, which is a real advantage.
Second, they are read-only by nature. This means that providing these APIs to a reporting team prevents them from accidentally using them for a write process. Creating a lean read-only API is great, but if someone write to it, and you don’t have all your data validation covered it could be a problem. A Query API prevents all write backs by its very nature.
You can read more about APIs here Business Central API Query Type
Source code in the Aardvark Labs GitHub
For another approach to this and a deeper dive into the Power BI aspects, check out Not a Pickle: Create APIs for Business Central Power BI Reporting.


Leave a comment