

BC AL Journey #4
Every adventure starts with a single step. In this case we are going to start with the simplest client request, add a few fields to a card.
For each example we are going to start with a use case, implementation, and test plan. For the first projects this is going to feel like overkill, but it is a discipline that is best started early.
You must plan your journey!
Use Case
User would like to add a way to store Color of 50 characters, Length, Width, Height, and Weight to the Item Card.
Implementation
- Extend the Item table with decimal fields for Length, Width, Height, and Weight values.
- Extend the item table with a 50-character text field for Color.
- Extend the Item Card page with the Color, Length, Width, Height, and Weight values.
Test Plan
- Review the Item Card and ensure that the Color, Length, Width, Height, and Weight values appear.
- Validate that the Length, Width, Height, and Weight fields accept Decimal values.
- Validate that the Color field accepts text up to 50 characters.
- Ensure that the values save correctly.
- Ensure that the values load correctly.
Simple enough of a request, let’s get started.
I realize that there are Wizards out there that can expedite this, but we are going to do fundamentals by hand and add Wizards later. It is important to know how things work without “magic” happening that can become out of date.
We always start a customization with the data tier. This allows the real-time validation and IntelliSense to work correctly.
Right Click on the “1 – Table Ext” folder and select “New File…” Name the new file “ARDItem.TableExt.al”. The names matter in Business Central AL and the system will complain if you don’t follow the approved naming conventions.
The first line defines a “namespace” for the customization. We will go into depth on this topic later, for now think of it as a box for your customization to live in. For this project we will use “namespace AardvarkLabs;”
Because we are in a namespace box, we can only see our customizations. To be able to see other objects we need to tell the system what other namespaces we are using. For this example, we need to add the line “using Microsoft.Inventory.Item;” because that is where the Item table that we want to extend lives.

We can now start to define the extension to the table. We do this by defining a tableextension, providing an object number, name, and which object it extends.
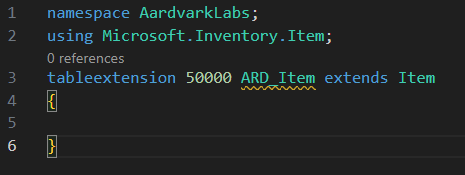
The object number of 50000 is defined in the App.JSON in the idRanges parameter. The name is arbitrary, but needs to start with ARD, which is defined in the AppSourceCop.JSON, which we will discuss later.
Notice that the tableextension object has a { and a } on lines 4 and 6. These define the “scope” of the tableextension object. Everything that relates to that object must be between these two characters.
My C-Style language peeps will recognize this structure. This structure is used throughout AL when defining tables, pages, and their extensions. Don’t worry my block-structured programming friends, Business Central AL has love for you too, and we will see that in future lessons.
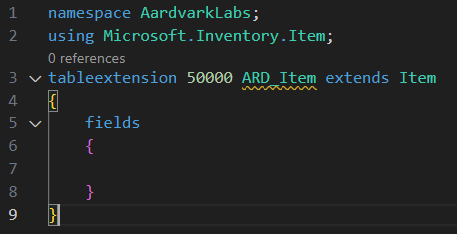
We need to add fields to this table extensions. We start by creating a Fields group and scoping it with { and }. This Fields scope is said to be inside the TableExtension scope.
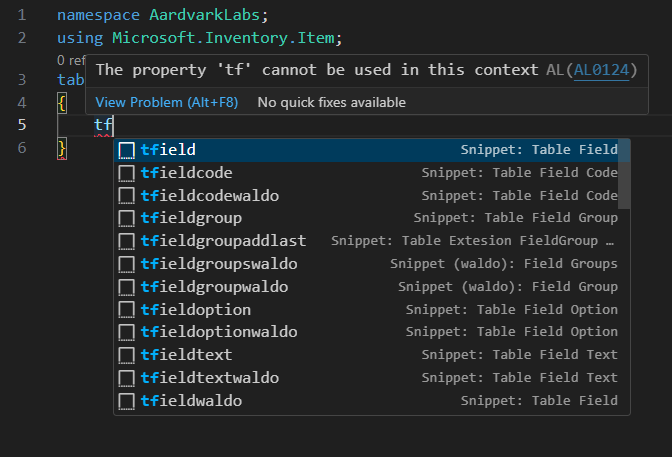
Now inside that fields scope, we are going to add fields, each with their own scope. There are snippets to help us out here; type “tf” and a menu should appear where you can select the table field snippet.
You should have something that looks like this:
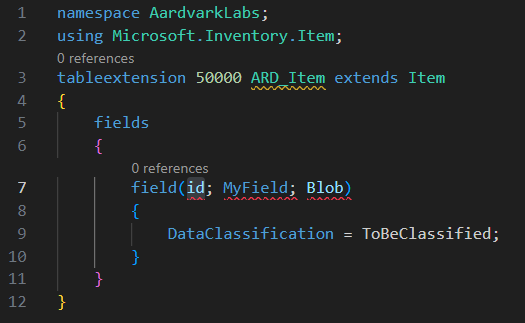
Every field needs an id, and as an extension it has to be within the range we setup in app.JSON, so we start at 50000. It needs a name, which should start with ARD_ and define the field we want to add. Lastly it needs a data type.
Inside the scope of each field we define a Caption, Data Classification, and a ToolTip. Given the requirements specified, here are the fields I’ve created.
namespace AardvarkLabs;
using Microsoft.Inventory.Item;
tableextension 50000 ARD_Item extends Item
{
    fields
    {
        field(50000; ARD_Color; Text[50])
        {
            Caption = 'Color';
            DataClassification = CustomerContent;
            ToolTip = 'Item Color.';
        }
        field(50001; ARD_Length; Decimal)
        {
            Caption = 'Length';
            DataClassification = CustomerContent;
            ToolTip = 'Item Length';
        }
        field(50002; ARD_Width; Decimal)
        {
            Caption = 'Width';
            DataClassification = CustomerContent;
            ToolTip = 'Item Width';
        }
        field(50003; ARD_Height; Decimal)
        {
            Caption = 'Height';
            DataClassification = CustomerContent;
            ToolTip = 'Item Height';
        }
        field(50004; ARD_Weight; Decimal)
        {
            Caption = 'Weight';
            DataClassification = CustomerContent;
            ToolTip = 'Item Weight';
        }
    }
}
The Caption is the default label for the field on the pages and lists. The ToolTip is what appears when you hover over the field. Both of these values can be overridden on the page definitions, but for consistency it is best to define both of these at the table level.
The Data Classification is used to identify the nature of the data for data privacy and GPDR tasks. We will discuss these later, for now “CustomerContent” will do just fine.
Your first table extension is done!
Not to add these fields to a page.
Just like the Table Extension, we are going to add a file to the 2 – Page Ext folder. Right click, select “New File…” and name it “ARDItemCard.PageExt.al”.
Just like the Table Extension we need to be part of a namespace and use the Microsoft.Inventory.Item namespace.
We need to tell the system that we are creating a Page Extension, provide an object id, a name and what it extends.
Note that the object number is 50000 again. The object numbers are per object type. We start at the first number in the range for each object type.
We are going to be updating the Layout, so we need to add a Layout Scope.

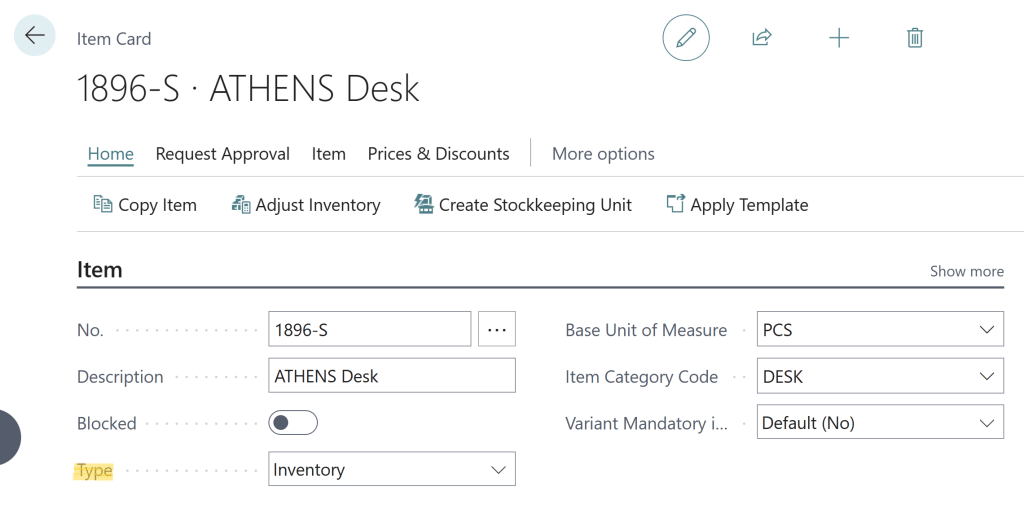
As this is a page extension, we have to tell it where we want to add our fields. This is done by creating (you guessed it) another scope. This scope can be “addafter”, “addbefore”, “addfirst”, and “addlast”. For each of these scopes we include a parameter that tells it what field we want to anchor to. For this example lets Add After the Type field.
Adding the fields consists of adding the field definitions for each field we want to display.
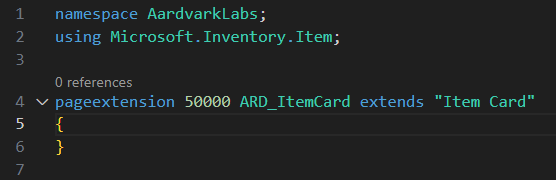
namespace AardvarkLabs;
using Microsoft.Inventory.Item;

pageextension 50000 ARD_ItemCard extends "Item Card"
{
    layout
    {
        addafter(Type)
        {
            field(ARD_Color; Rec.ARD_Color)
            {
                ApplicationArea = All;
            }

            field(ARD_Length; Rec.ARD_Length)
            {
                ApplicationArea = All;
            }

            field(ARD_Width; Rec.ARD_Width)
            {
                ApplicationArea = All;
            }

            field(ARD_Height; Rec.ARD_Height)
            {
                ApplicationArea = All;
            }

            field(ARD_Weight; Rec.ARD_Weight)
            {
                ApplicationArea = All;
            }
        }
    }
}
You can see that each field is represented here with a field, a name and a data source. The value “Rec” is AL’s way of pointing us to the current record. There are other things we can display on a page that is not from a record, but we will address those later.
Every field needs to know what Application Area it belongs to, for almost all customizations designed for a known system we use All, which is what we will be doing for now.
We did it! If we run this customization by pressing F5 or going to the Run menu and selecting “Start Debugging” the system will launch Business Central and install our customization and bring up the web page. Watch the lower right corner of the screen if VS Code prompts you to login to Business Central.
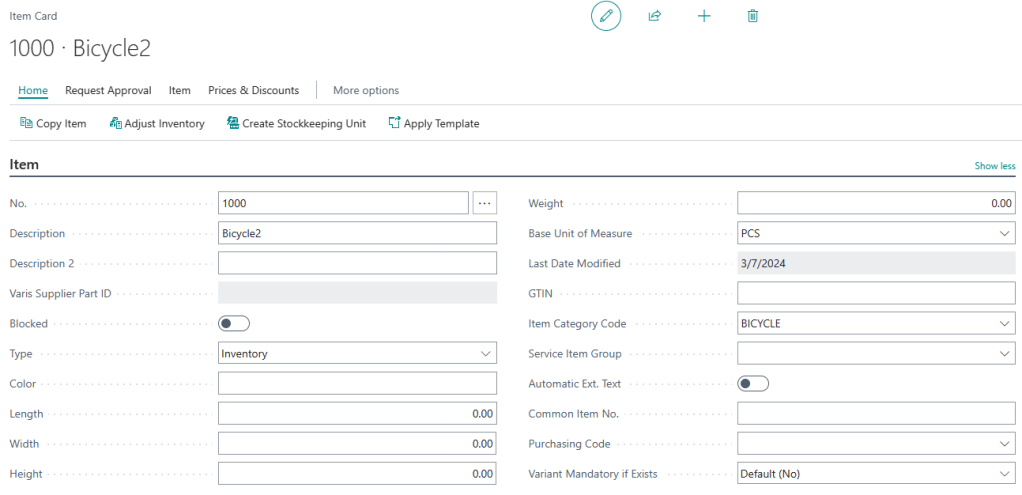
From here we can test the page to ensure everything works as expected. You may need to press the “Show More” button in the upper right of the Items Group.
That is it. It is a lot to grasp to start with, but the patterns are very similar as we move to new tables, pages, code units, and so forth.


Leave a comment