
To advance our testing a little further, and test against new and future releases, lets install Docker and host our own Business Central instance.
Please note that this is not required for the Business Central AL Journey series. It is an amazing technology and can be useful for some development use cases, but not required.
If you are unfamiliar with Docker, it is a system to create “containers” that hold all the components of a solution. You can have Docker Containers for SQL Servers, Minecraft Servers, and Business Central servers just to name a few.
I would be amiss not to mention Freddy’s Blog when discussing anything related to Business Central Containers. This is the source of all my knowledge. His Blog tag line is “Learn something new… – then Teach someone!”, and I’m going to teach you how I implement and use Docker.
You will need to be running 64-bit Windows 10/11 Professional or Enterprise.
Before we start, there are challenges here that this blog will not be able to help you with. You will need to have Virtualization enabled on your PC which may require a BIOS setting update. There may be other challenges based on your system, be brave, you’ve got this!
The Docker installation procedure is here, Install Docker Desktop on Windows | Docker Docs
Follow the installation instructions for the WSL2 backend installation. You can find the instructions here: https://learn.microsoft.com/en-us/windows/wsl/install. It boils down to running this command in PowerShell as an Administrator.
wsl --install
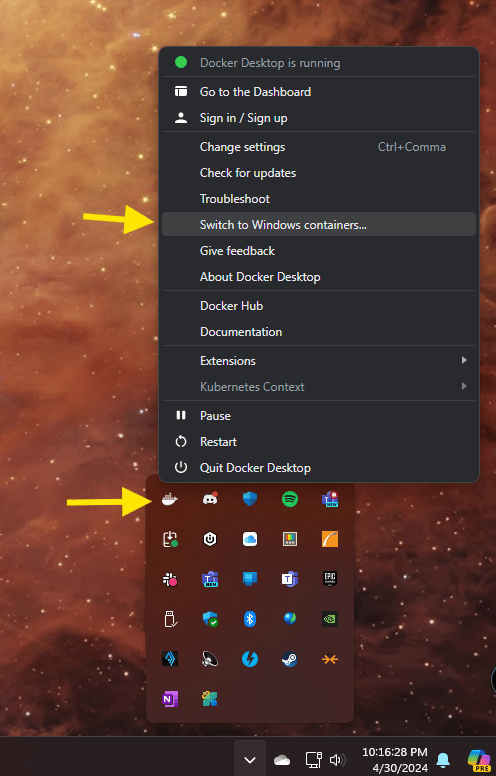
Download and run the Docker Desktop Installer. It will take a few minutes and if all goes well, there will be a Whale Icon with the clock. Right click on it and switch it to Windows Containers.
If you windows system doesn’t have Hyper-V enabled, you will be greeted with this popup.

Run PowerShell as an Administrator and execute this command:
Enable-WindowsOptionalFeature -Online -FeatureName $("Microsoft-Hyper-V", "Containers") -All
Reboot and try to switch to windows containers again.
You will know that you are successful when the menu changes to “Switch to Linus containers”

All of our work with Docker will take place in PowerShell. I prefer PowerShell ISE running as an Administrator.
First we need to set the execution policy.
Set-ExecutionPolicy unrestricted
After running that, we are going to install the BContainerHelper.
Install-Module BCContainerHelper
Import-Module BCContainerHelper
You will be prompted to confirm several times. Please click Yes.
The BC Container Helper is full of tools to help. We are interested in the commands to create a Business Central Sandbox container. There are a lot of option, this PowerShell script creates a basic Business Central Sandbox container.
$credential = get-credential -UserName "admin" -Message "Enter BC Super User Credentials"
$CurrentImage = Get-BCArtifactUrl -country us -select Latest -type Sandbox
New-BcContainer -accept_eula `
                    -auth UserPassword `
                    -artifactUrl $CurrentImage `
                    -Credential $credential `
                    -containerName aardvarklabs `
                    -shortcuts DesktopFolder `
                    -updateHosts
Running this will pop up a prompt for an admin user. This user is going to be the administrative user for the new Business Central server. The user and the password you enter is how you will log into the system.
The first container you create will take a while, don’t panic.
The system is downloading the latest release of Business Central, building a server and hosting system, and dropping a folder on your desktop.
Here is where we can run into issue with Virus Scanners and Device Access Control. Monitor the logs as they are generated in PowerShell and adjust your security as needed. You may need to temporarily disable real-time threat detection.
If everything goes well, you will have a folder named “aardvarklabs” on your desktop that contains two command prompts and a “Web Client” link. Click the Web Client link and you should be able to login to your BC environment.
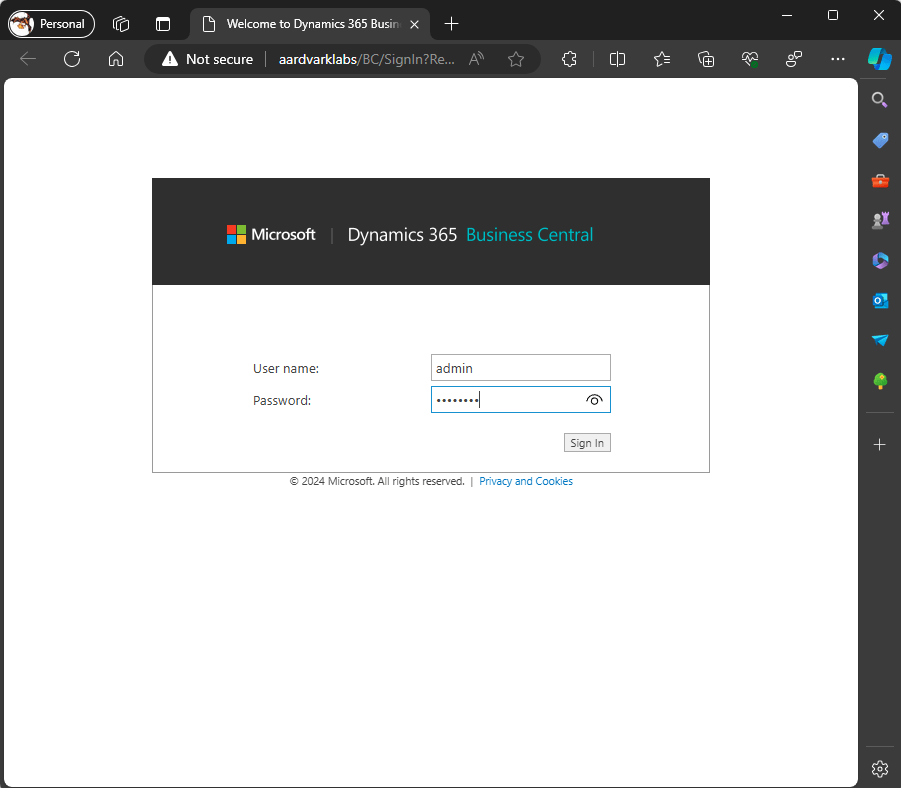
Use the password you set during the installation and you have your own private Business Central Sandbox running locally.
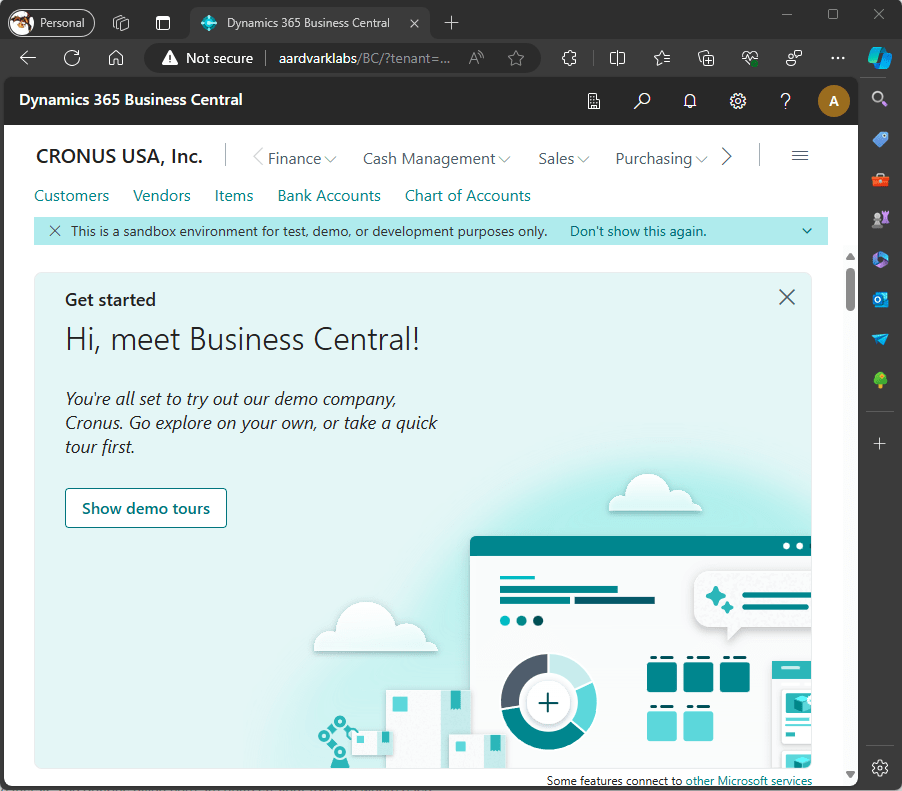
You will be missing some Azure specific features, such as Copilot. However, when developing some more complex or experimental features, it is nice to have a safe place to work (Dr. Strange Mirror Dimension is you will). If you do completely break Business Central, you can just delete the container and build a new one.
When you are done and want to delete the container, here is the command to do that.
Remove-BCContainer -containerName aardvarklabs
A moment of complete honesty here. I’ve installed Docker dozens of times and create my containers using a script that allows me to select several different options. I had issues getting it to work on this specific PC. I had to add the “-isolation hyperv” parameter for my script to work. I’ve never had to do that before.
I got the help I needed from the all power Fredy’s Blog: Troubleshooting Business Central on Docker | Freddys blog
I hope you were successful in setting up Docker, please share any tips and tricks in the comments. There are a lot more settings and features and I will be talking about them at a later time. For now, have fun!


Leave a comment