

BC AL Journey #29
In BC AL Journey #27 we introduced the Reporting objects and created our first Excel Report. This is great for table and chart view data, but what about a more document style layout, like a Sales Invoice or Customer Sales History report? For these we have two options, Microsoft Word and RLDC. This week we will tackle the Microsoft Word Report.
Like the Excel reports, Word reports are a great way to democratize development. A developer creates the Report Object, and a Word Power User can handle the report layout. It’s not that I don’t like laying out reports, but per my previous post, it isn’t always in everyone’s best interest to let me pick the colors.
I’m going to create a new file in the 9-Reports folder named ARDVendorActivity.Report.AL
namespace BCJourney.BCJourney;

using Microsoft.Purchases.Vendor;
using Microsoft.Purchases.Payables;

report 50001 ARD_VendorActivity
{
    ApplicationArea = All;
    Caption = 'Vendor Activity';
    UsageCategory = ReportsAndAnalysis;
    DefaultLayout = Word;
    WordLayout = 'Layouts\ARD_VendorActivityLayout.docx';
    dataset
    {
        dataitem(Ard_Vendor; Vendor)
        {
            RequestFilterFields = "No.";
            column(No; "No.")
            {
            }
            column(Name; Name)
            {
            }
            dataitem(Ard_VendorLedgerEntry; "Vendor Ledger Entry")
            {
                RequestFilterFields = "Posting Date";

                DataItemLink = "Vendor No." = Field("No.");
                DataItemTableView = sorting("Vendor No.", "Posting Date", "Currency Code")
                                      where("Document Type" = FILTER(Invoice | "Credit Memo"));

                column(PurchaseAmount; "Purchase (LCY)")
                {
                }
                column(PostingDate; "Posting Date")
                {
                }
            }
        }
    }
    requestpage
    {
        layout
        {
            area(Content)
            {
                group(GroupName)
                {
                }
            }
        }
        actions
        {
            area(Processing)
            {
            }
        }
    }
}
This is almost exactly the same as what we saw in BC AL Journey #27 and the API Queries in BC AL Journey #26.
This time when we publish the new report and run it by searching for “Vendor Activity”
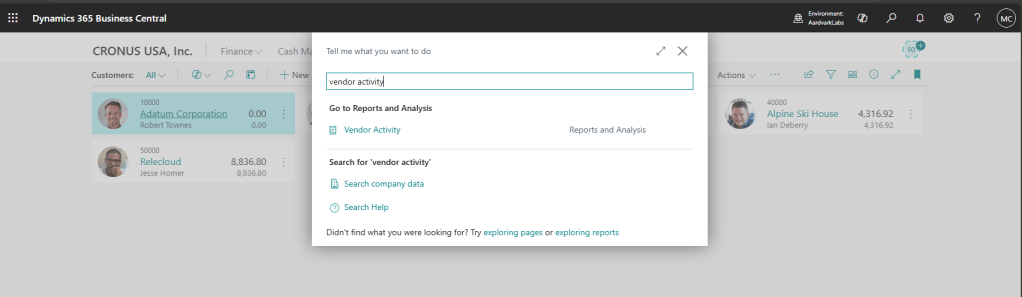
We can select a Vendor and click “Print” or “Preview & Close” but all we get is a blank page. If you are wondering, I was in a good flow and I took a screen shot of a white screen.
Unlike the Excel report that automatically contains data that we format on another tab, the Word reports don’t have a default dataset that we can see. We are going to create a Report Layout.
Go to the Report Layouts page, filter to the Vendor Activity Report, and select Export Layout.
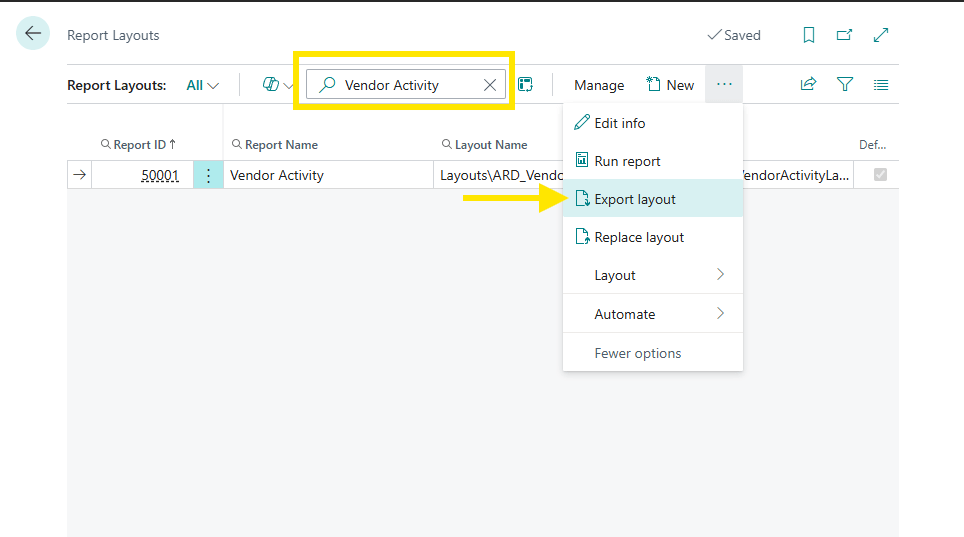
Your browser will download a DOCX file ready for us to create a new layout.
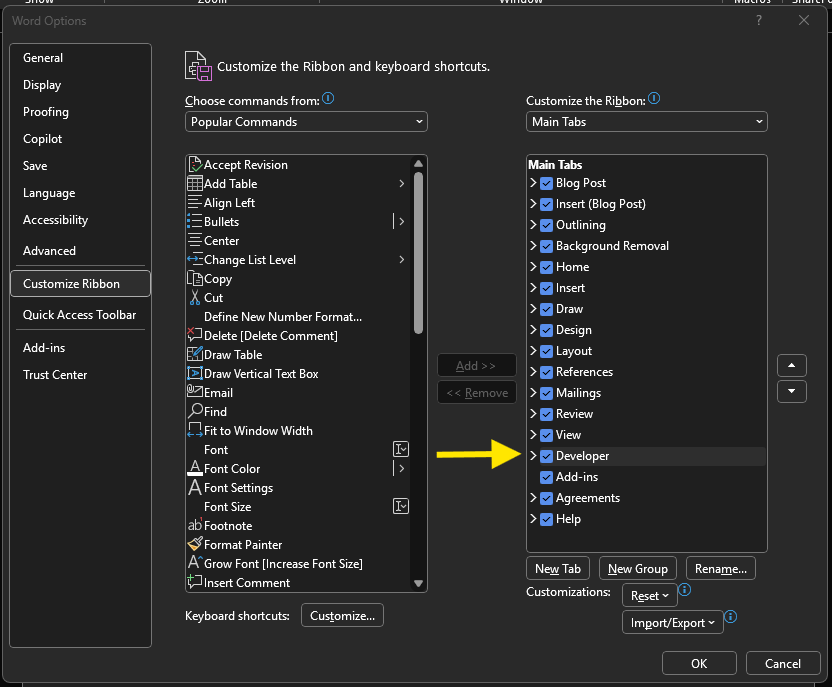
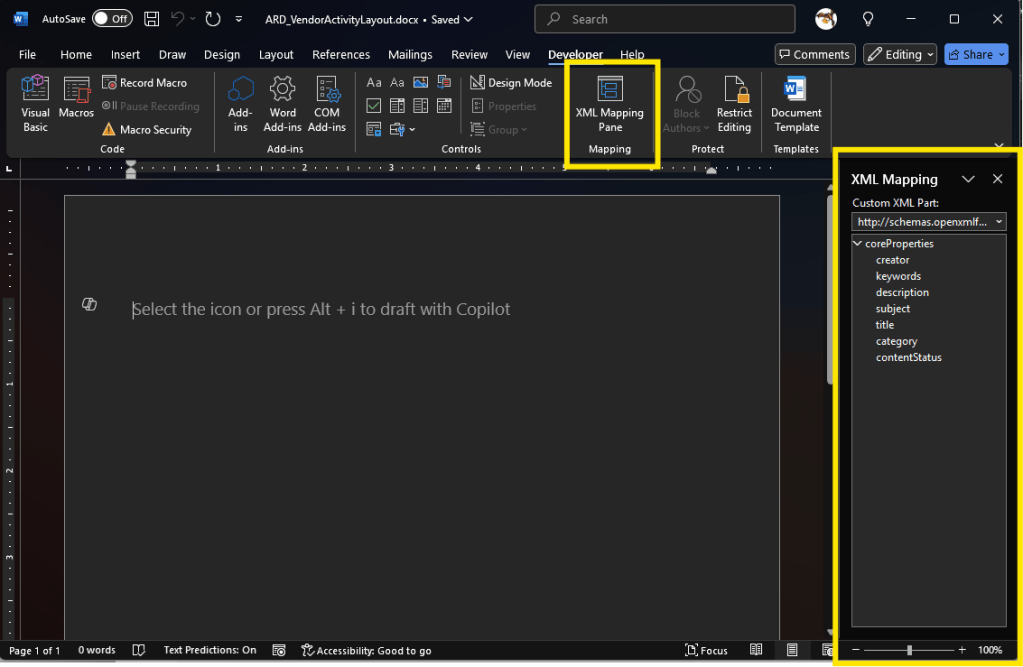
If Word isn’t displaying a Developer tab like this:
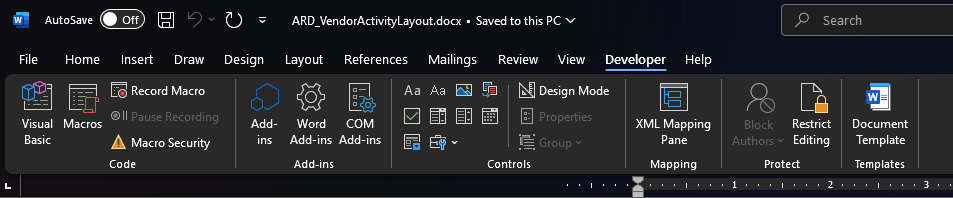
Then you need to enable the Developer Ribbon by clicking on File then Options. Once there, select the Customize Ribbon option on the Left and activate the Developer tab.
With that all sorted out, we can open the Developer Tab, and click on the “XML Mapping Pane” button. This will bring into view the XML Mapping data.
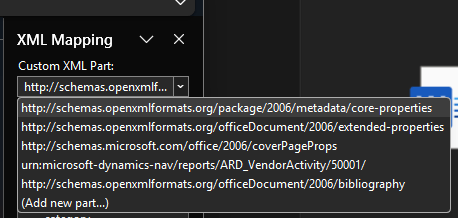
The XML Mapping is where our data for the report is hidden, we need to select it from the list of available XML Data sets. Clicking the drop down we can see urn:microsoft-dynamics-nav/reports/ARD_VendorActivity/50001
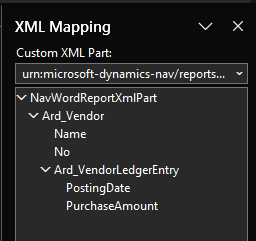
When we select that, we can see the data elements from our report.
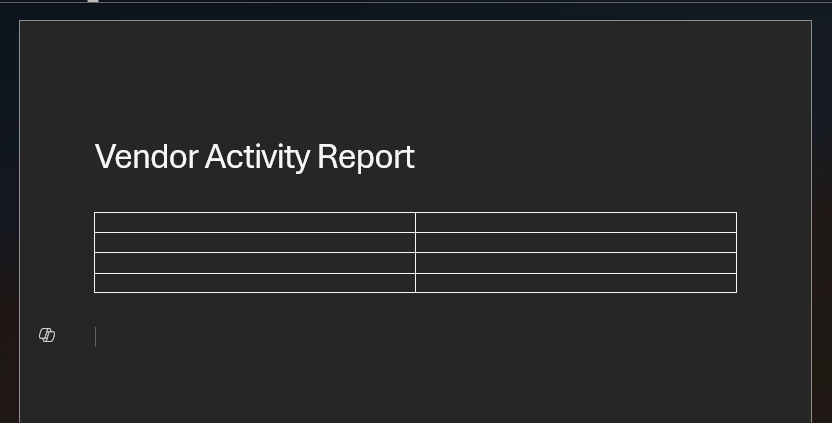
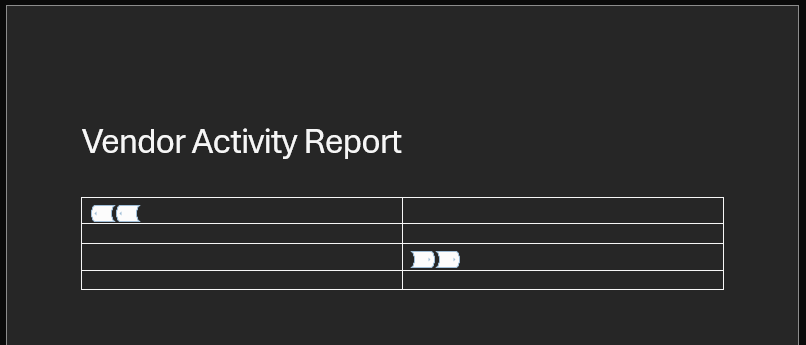
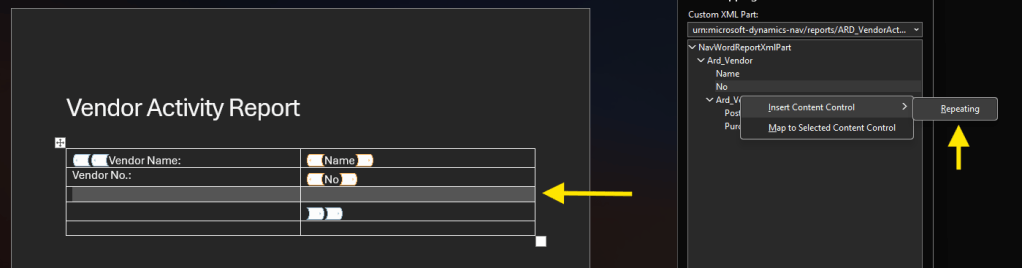
We can now start to layout our report. I’m going to add a heading and a little bit of text, then I would like to have the Vendor name appear. Because the report can span several different vendors, we will need to start with a Table and a Repeating control.
Here is where I’m starting with a Table that has one more row than what I need for the data layout.
I’m going to select all the rows except for the last one.

Then we add repeating controls by selecting the header element and then Repeating.
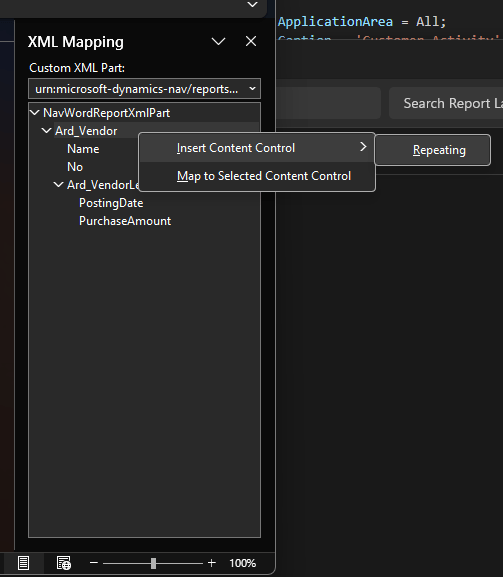
Into the repeating control we add the vendor’s name. To add the Vendor name from the report we select the cell we want to place the data then in the XML Mapping right click on the field and use the Insert Control menu to add a Rich Text data element to the report. We can do the same with the No. value.
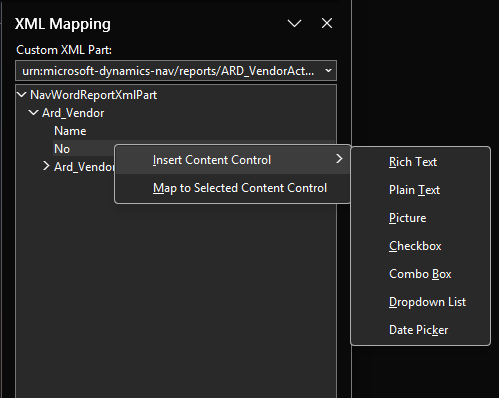
We can see the data element inserted.
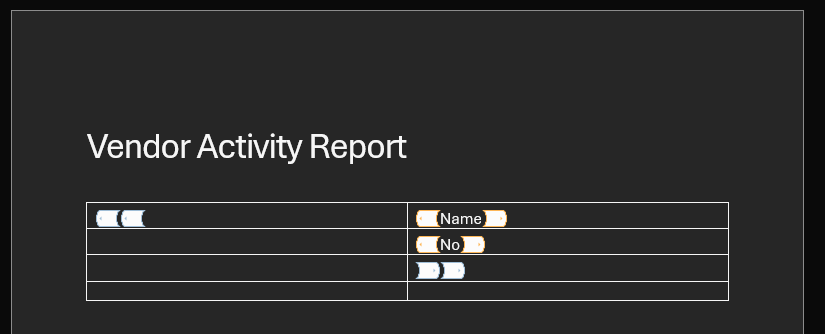
I’ve added the Field descriptions in the cells to the Left of the values.
We have repeating data within this report, let’s add another row below No. and a repeating control into that row. After adding the row, select the whole row and add a repeating control like we did for the header.
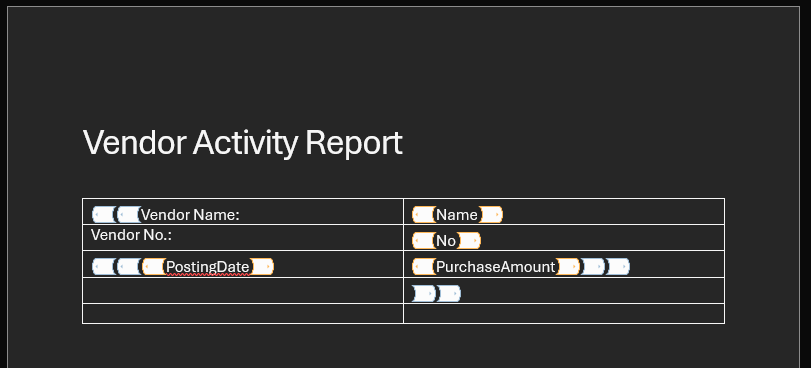
Now we have a repeating section that will repeat for each row in the data set.
We can then add the Posting Date and Purchase Amount just like we did with the Vendor Name and Number.
That is a good start, let’s publish this and see what it looks like. Here is a link to my very simple word document.
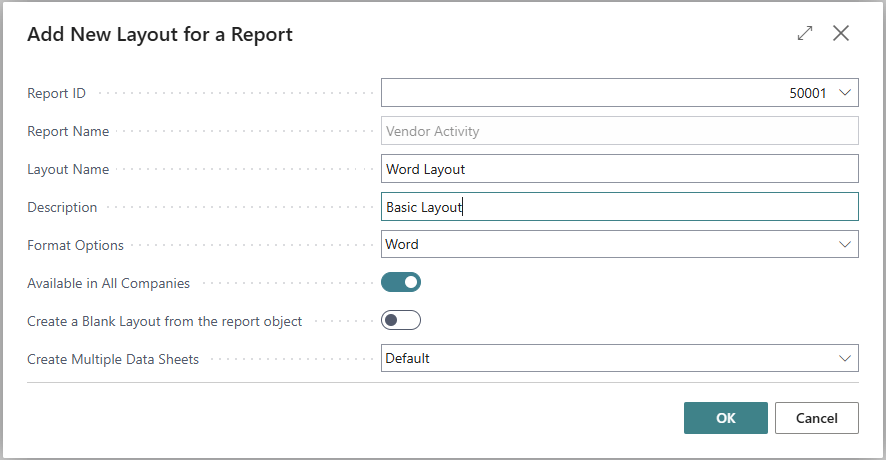
Before we can add our new report, we need to create a custom layout. Select the report and click the New button and fill out the form.
We can now select the new layout, and click the Replace layout button to upload your new layout.
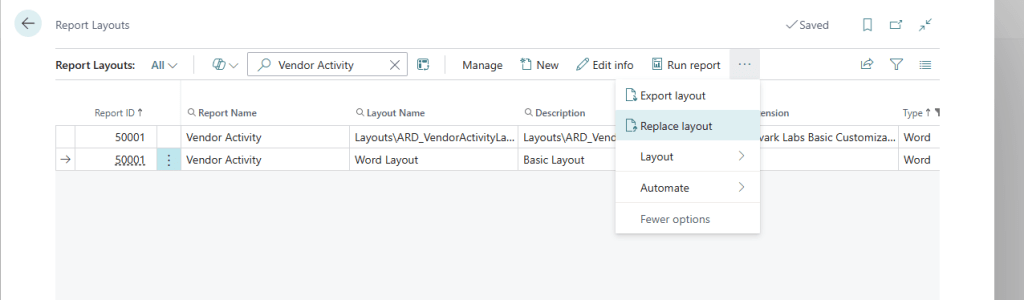
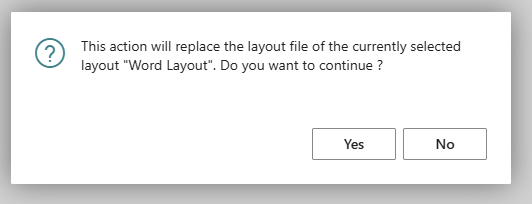
You will be warned that this will replace the layout, which is what we would expect from the button.
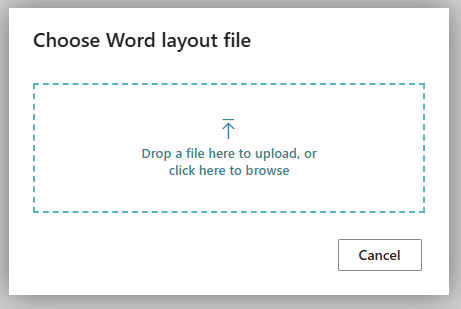
Browse or Drag and Drop to upload your Word document.
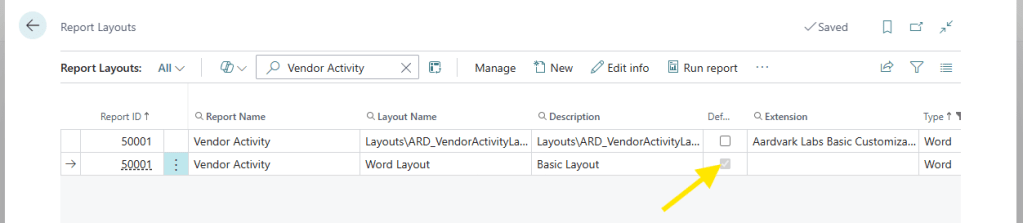
Don’t forget to flag this version as the Default.
Now when we run the Vendor Activity report we see our nice new report.

Granted this report is super simple, however combined with what we learned editing reports in BC AL Journey #28 we can do a lot of great things. We will expand on this all later.
These reports take a little more effort than the Excel reports to setup, but the layout is much more capable when we are looking for a document style report.
The process for editing the stock reports is the same. You can create a new layout, download an existing layout, edit it, upload it, and consume it.
Want the Source Code? The entire solution is available in the AardvarkMan GitHub.


Leave a reply to Understanding RDLC Reports in Business Central – Aardvark Labs Cancel reply