
Kim Congleton and I recently had a request to connect Claude with a Business Central MCP. One of the challenges I’ve experienced so far has to do with authentication and configuration. With all the MCP systems out there, all backed by different authentication systems, it may be difficult to connect to a specific server.
Here is a method to connect Claude desktop to a Business Central MCP. To reduce the complexity required for Claude to connect, as well as facilitate other AI Agents, we will use a locally hosted Proxy.
If you don’t like my flavor of walkthrough, the instructions are here: BCTech/samples/BcMCPProxyPython at master · microsoft/BCTech
You are going to need to have your Business Central MCP Server up an running first. Go to this post and follow along until it directs you to go to Copilot Studio. Instead, come back here.
The first step is setting up the Azure AD App Registration.
- Go To portal.azure.com
- Navigate to Microsoft Entra ID
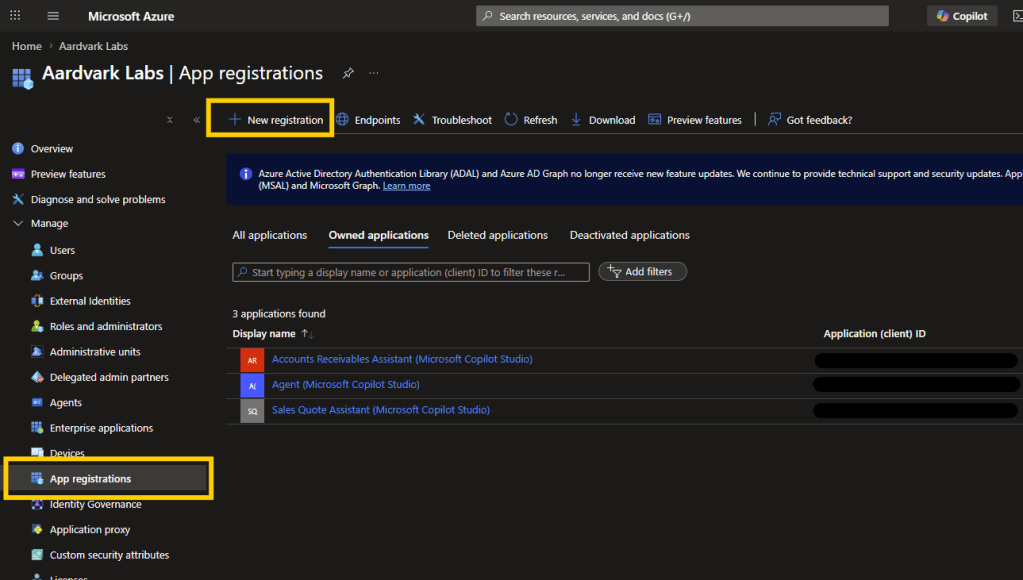
- Create a New App Registration
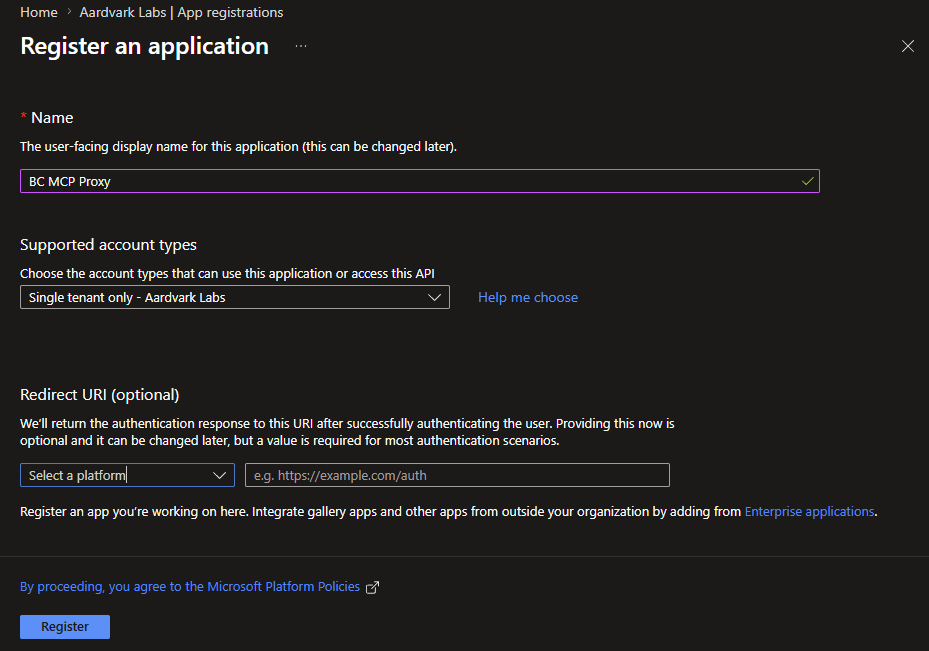
4. Give it a name and click Register
5. Make a note of the Client Id on the Overview Page
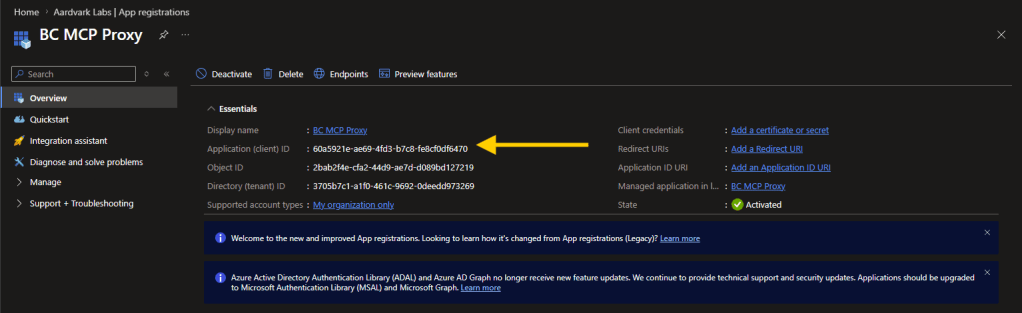
6. Click on Add a Redirect URI
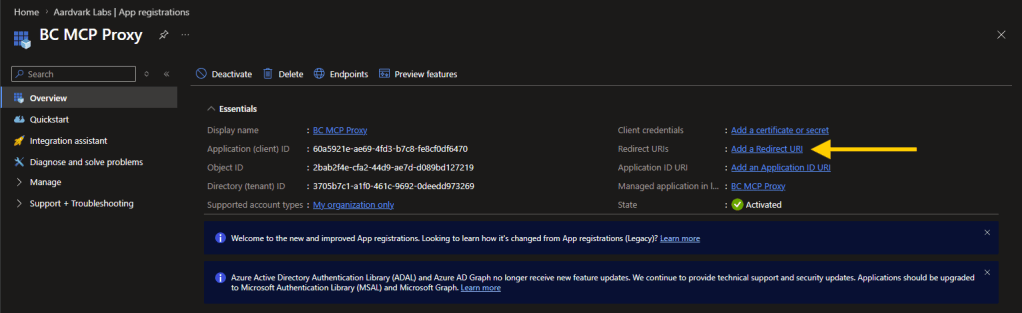
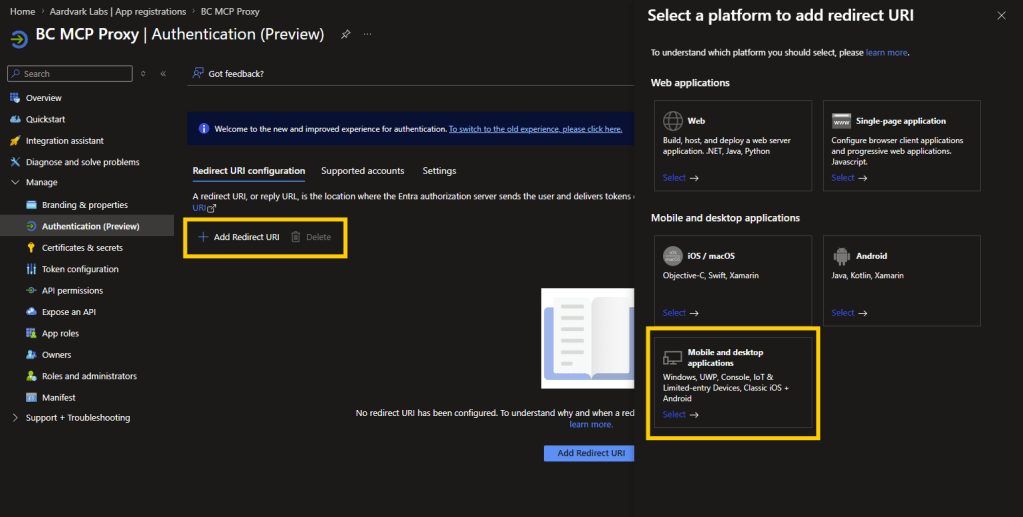
7. On the page it opens, select “Add Redirect URI.
8. Select “Mobile and desktop applications”
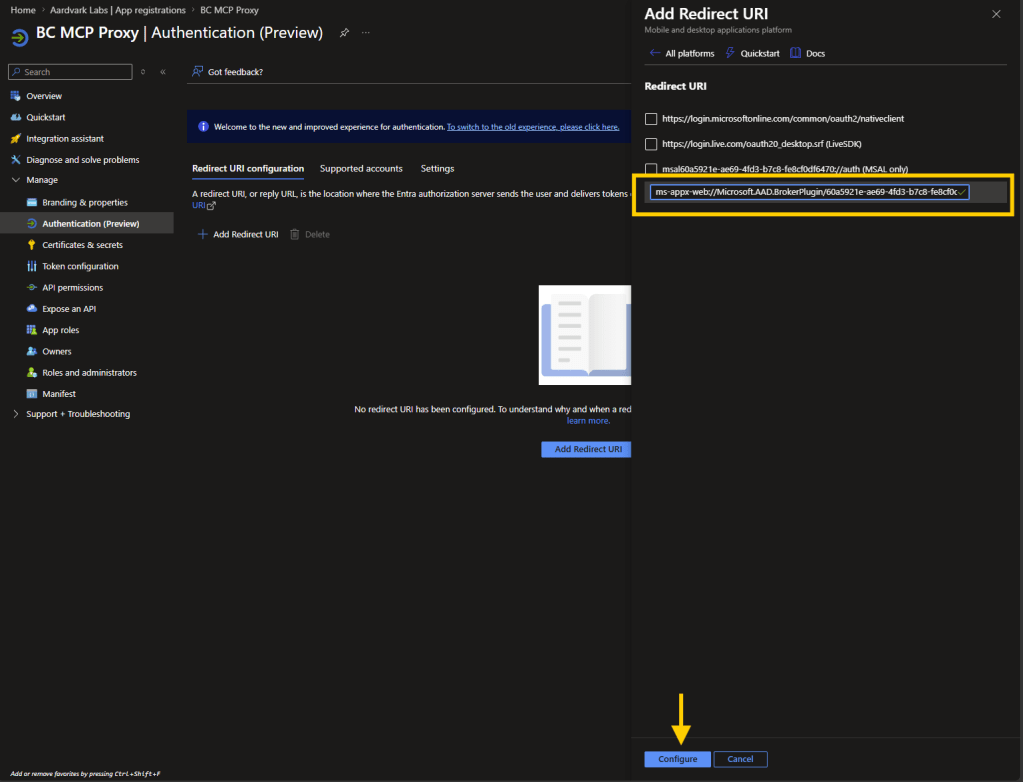
9. The Redirect URI is:
ms-appx-web://Microsoft.AAD.BrokerPlugin/<clientID>
We need to replace the <clientID> with the client id of the App Registration. In the case of this example the URI is:
ms-appx-web://Microsoft.AAD.BrokerPlugin/60a5921e-ae69-4fd3-b7c8-fe8cf0df6470
Click Configure when done.
11. We are going to repeat the process adding a Web URL.
12. Click “Add Redirect URI” again.
13. Select Web
14. Add the URL: https://businesscentral.dynamics.com/OAuthLanding.htm
15. Click “Configure”
16. Before leaving this screen, click “Settings” and enable “Allow public client flows”
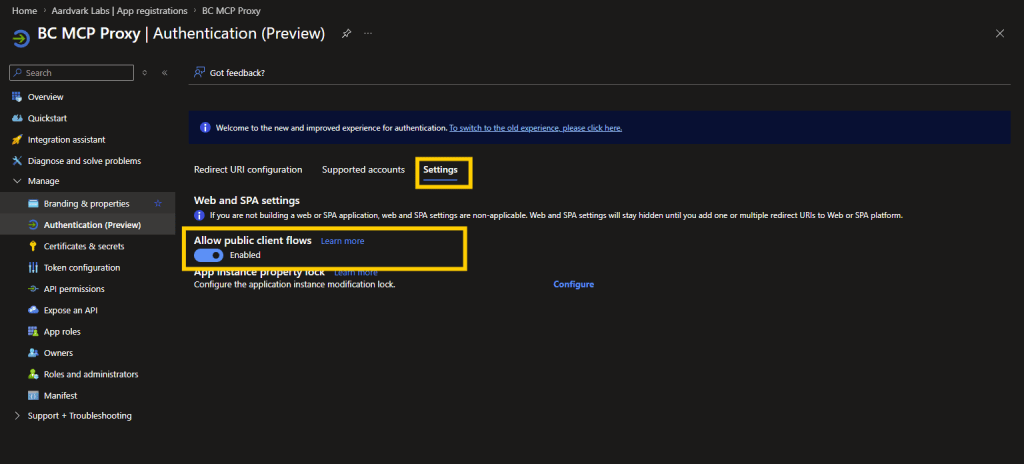
Click Save at the bottom of the screen.
17. Select “API Permissions” from the left side of the screen.
18. Add the Financials.ReadWrite.All, and User_Impersonation permissions.
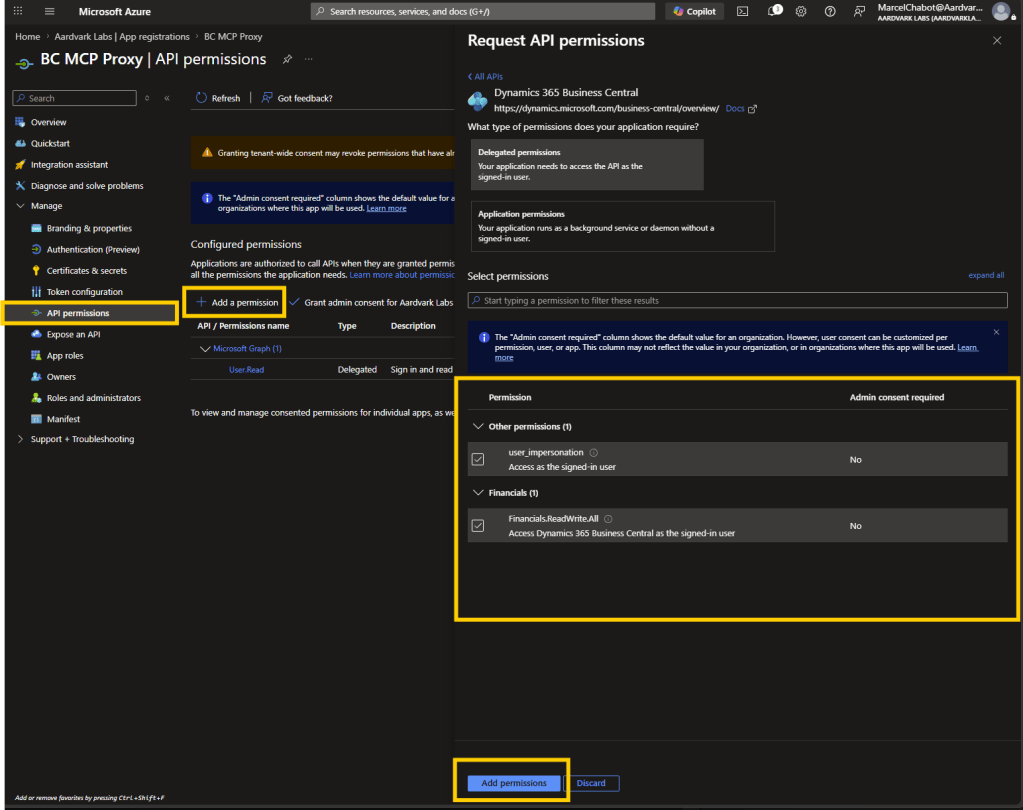
19. Click “Grant admin consent for …”
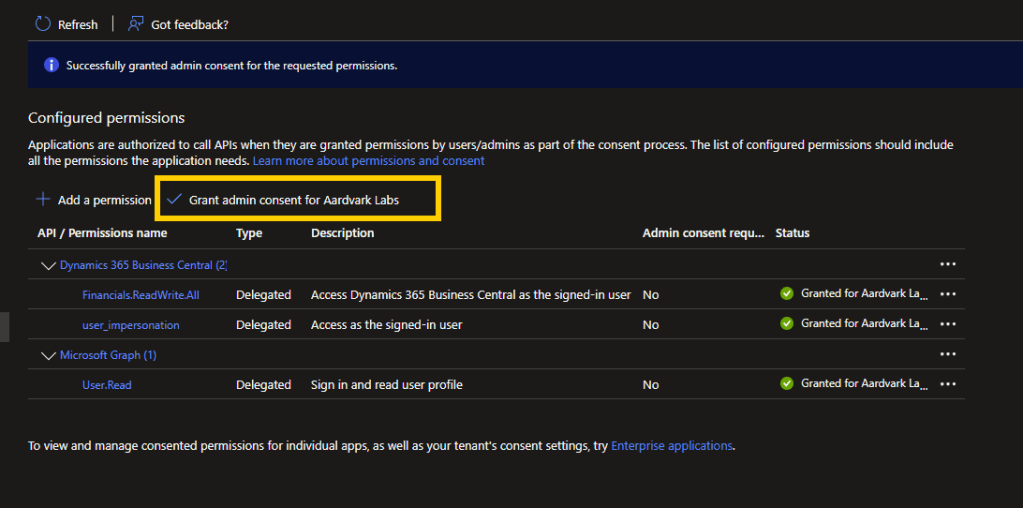
Now over to Business Central.
- In the “Tell Me” Magnifying glass enter “Microsoft Entra Applications”
- Click on “Microsoft Entra Applications”
- Click the New button.
- Paste in the Client Id
- Provide a Description
- Click Grant Concent
- Set the State to Enabled
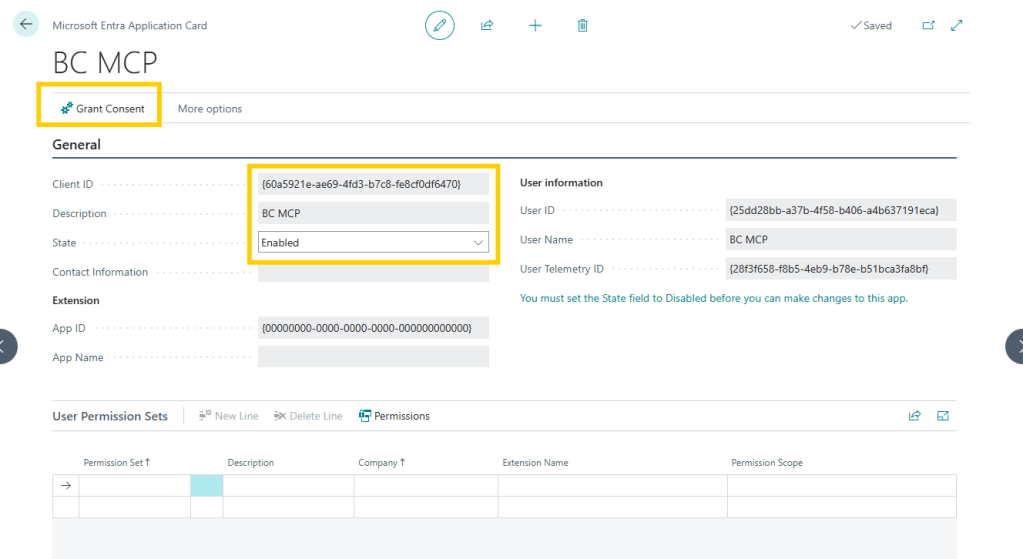
We don’t need to grant this any permissions, that is all handled by the MCP Server configuration.
The next step takes place in the Command Prompt and will require that you have Python installed. You can download and install Python from python.org or from the Microsoft Store.
- Run Command Prompt as an Administrator
- Run the following command
python -m pip install --upgrade bc-mcp-proxy && python -m bc_mcp_proxy setup
3. Once the install has completed you will be prompted for a few settings.

Be careful, it is easy to swap the Directory ID and Client ID when switching screens.
It will toss out a line (or two) for you to sign in. You go to https://login.microsoft.com/device and enter the code displayed on your screen.
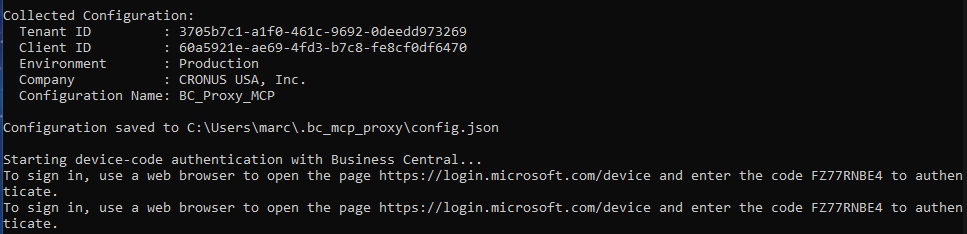
If everything goes well, you should see “Authentication successful!” and a link to three different configuration files.

Open the settings file for Claude. Here is what mine looks like:
{
  "command": "C:\\Python314\\python.exe",
  "args": [
    "-m",
    "bc_mcp_proxy",
    "--TenantId",
    "3705b7c1-a1f0-461c-9692-0deedd973269",
    "--ClientId",
    "60a5921e-ae69-4fd3-b7c8-fe8cf0df6470",
    "--Environment",
    "Production",
    "--Company",
    "CRONUS USA, Inc.",
    "--ConfigurationName",
    "BC_Proxy_MCP"
  ]
}
Now over to Claude Desktop.
- Open Settings
- Select Developer
- Click Edit Config
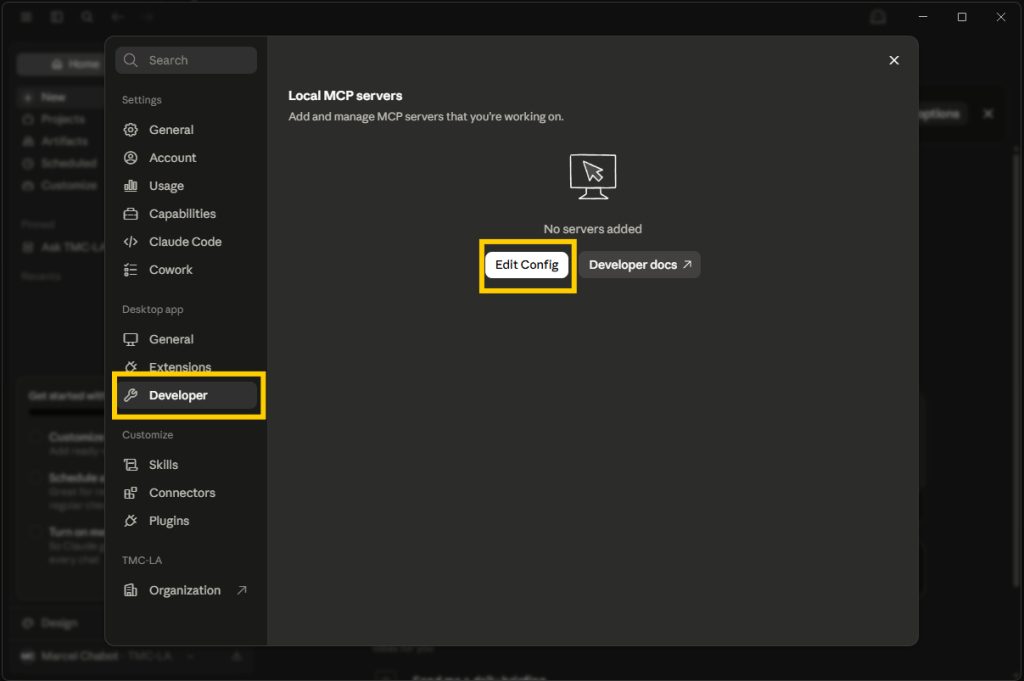
4. This will open your File Explorer.
5. Open “claude_desktop_config.json”
Now depending on how long you have been using Claude and what you have installed, this file can be quite long. What we are looking to do is add an mcpServers node to the end of the file.
First I added the sections I needed for the mcpServers list and the MCP Server I want to add.
{
  "preferences": {
    "launchPreviewPersistedWorkspaces": [],
    "launchPreviewSessionScopedSessions": [],
    "remoteToolsDeviceName": "zettadev",
    "coworkHipaaRestricted": false,
    "coworkWebSearchEnabled": false,
    "coworkModelAutoFallbackByAccount": {
      "7bb95a4a-5d51-4716-a9d8-e6f25ef1d602": true
    },
    "coworkScheduledTasksEnabled": true,
    "ccdScheduledTasksEnabled": true,
    "epitaxyPrefs": {
      "ccd-sessions-filter": {
        "state": {
          "selectedProjects": []
        },
        "version": 0
      }
    },
    "bypassPermissionsGateByAccount": {
      "7bb95a4a-5d51-4716-a9d8-e6f25ef1d602": true
    }
  },
  "coworkUserFilesPath": "C:\\Users\\marc\\Claude",
  "mcpServers": {
    "BC_Proxy_MCP":{

    }
  }
}
Note that I added the comma at the end of line 25.
Now I paste in the configuration generated by the Proxy server into the line 28.
The end result looks like this:
{
  "preferences": {
    "launchPreviewPersistedWorkspaces": [],
    "launchPreviewSessionScopedSessions": [],
    "remoteToolsDeviceName": "zettadev",
    "coworkHipaaRestricted": false,
    "coworkWebSearchEnabled": false,
    "coworkModelAutoFallbackByAccount": {
      "7bb95a4a-5d51-4716-a9d8-e6f25ef1d602": true
    },
    "coworkScheduledTasksEnabled": true,
    "ccdScheduledTasksEnabled": true,
    "epitaxyPrefs": {
      "ccd-sessions-filter": {
        "state": {
          "selectedProjects": []
        },
        "version": 0
      }
    },
    "bypassPermissionsGateByAccount": {
      "7bb95a4a-5d51-4716-a9d8-e6f25ef1d602": true
    }
  },
  "coworkUserFilesPath": "C:\\Users\\marc\\Claude",
  "mcpServers": {
    "BC_Proxy_MCP": {
      "command": "C:\\Python314\\python.exe",
      "args": [
        "-m",
        "bc_mcp_proxy",
        "--TenantId",
        "3705b7c1-a1f0-461c-9692-0deedd973269",
        "--ClientId",
        "60a5921e-ae69-4fd3-b7c8-fe8cf0df6470",
        "--Environment",
        "Production",
        "--Company",
        "CRONUS USA, Inc.",
        "--ConfigurationName",
        "BC_Proxy_MCP"
      ]
    }
  }
}
6. Quit Claude Desktop. This includes going into Task Manager and killing the process.
7. Restart Claude
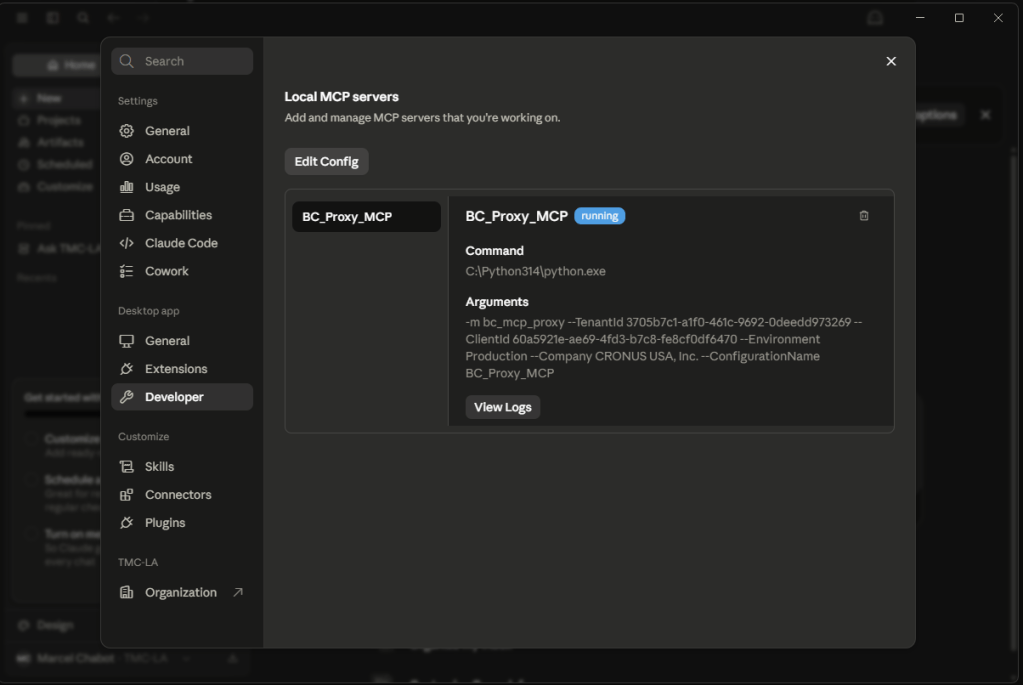
Now if you check Settings, Developer you should see something like this:
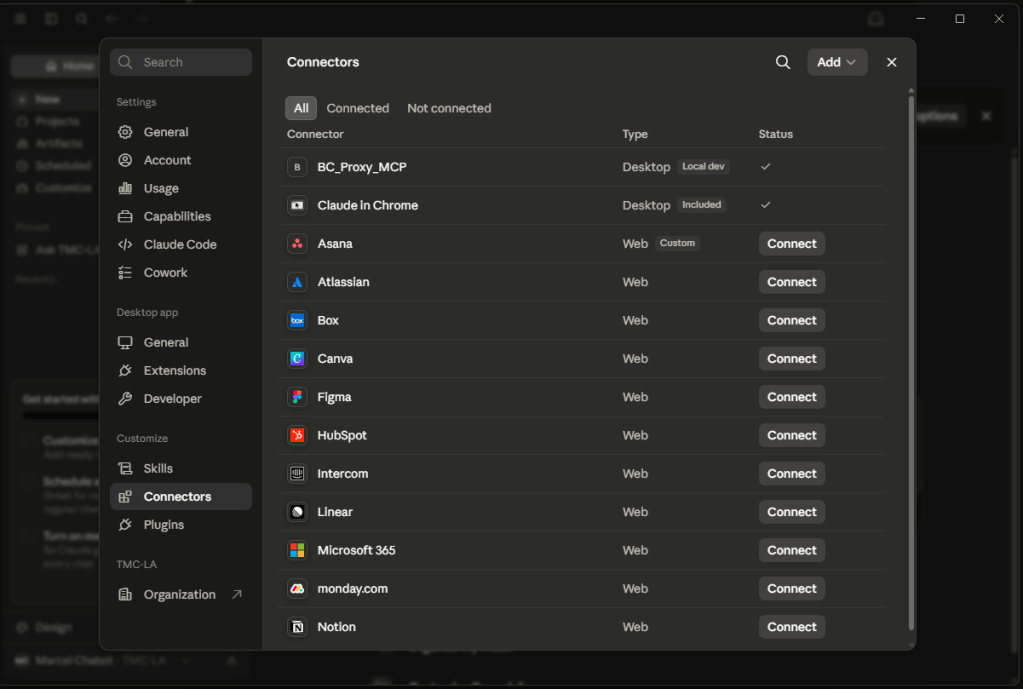
Under Connectors, you should see your MCP listed.
We are done!
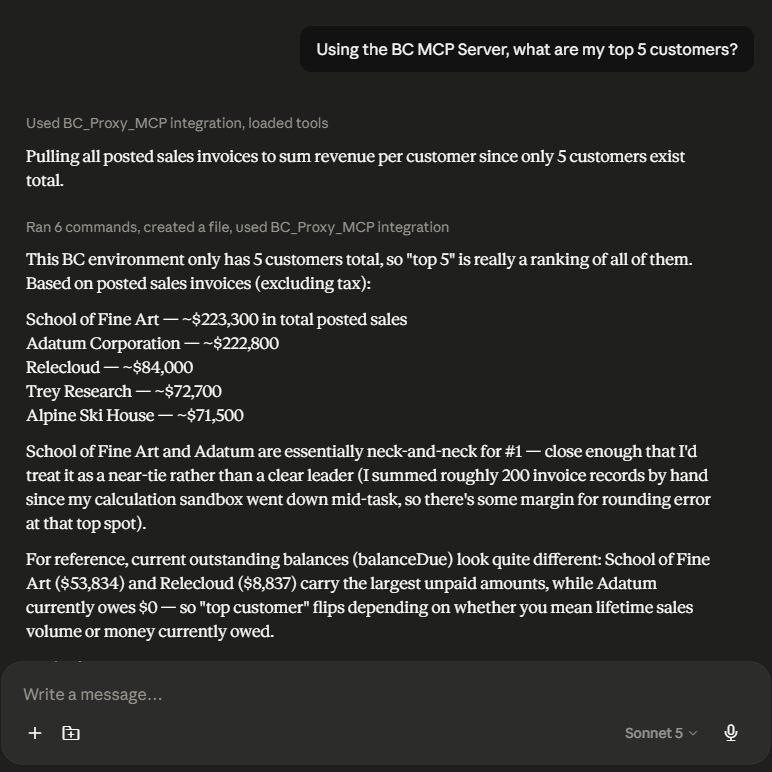
You can now ask Claude questions about your Business Central data, and after a few prompts for your permission, it will provide results.
This approach also works for VS Code and Cursor.
I hope this help you get your AI Agents talking to Business Central. Let me know if you have any questions and if you have gotten any good Business Central insights from Claude.




Leave a Reply